
If you’re planning a remodel, learning the real secrets of drywall removal can save you hundreds (sometimes thousands) of dollars—and prevent some very expensive mistakes. Pros make this look easy because they know what they can smash…and what could flood the house, start a fire, or collapse a ceiling. This guide pulls back the curtain on what contractors actually do (and think about) before they ever swing a hammer.
Demo vs. Destruction: The Mindset Pros Use
Professional drywall demo is less about brute force and more about control. The goal isn’t to “tear out all the drywall.” The goal is to remove only what’s necessary:
- Without breaking pipes, wires, or ducts
- Without damaging framing you might reuse
- With as little dust and cleanup as possible
- While protecting floors, doors, and nearby rooms
Pros think in terms of surgical removal, not demolition. That mental shift alone will change how you approach your project.
Secret #1: Prep Takes Longer Than You Think
Most DIYers rush setup and pay for it later. Pros do the opposite: they often spend more time prepping than actually doing drywall removal.
Protection and containment
Before a pro makes a single cut, they usually:
- Lay down rosin paper or thick plastic and tape seams
- Remove or cover doors, vents, and returns
- Set up plastic walls (zip walls) to isolate the work zone
- Create a negative-pressure area with a fan out a window, so dust flows out, not into the house
They’re not being fussy; they’re saving time on post-demo cleanup and protecting finished surfaces that would be expensive to repair.
Tool staging
Pros also stage tools where they can reach them without leaving the room every five minutes:
- Utility knives with fresh blades
- Pry bars (flat and wrecking)
- Reciprocating saw with short, flexible blades
- Drywall saw
- Shop vac with a HEPA filter
Having the right tools in arm’s reach prevents “improvising” with the wrong tool—a common cause of damage to wiring, pipes, and framing.
Secret #2: Pros Don’t Guess What’s Behind the Wall
The number-one difference between professional and DIY drywall removal is how much guessing is involved. Pros almost never swing blindly at a wall.
How pros “x-ray” a wall
Before removing drywall, they:
-
Locate studs and cavities
- Use a stud finder
- Tap and listen for changes in sound
- Look for outlet and switch locations (wires are almost always running nearby)
-
Identify potential utilities
- Look at what’s on the other side of the wall (kitchen? bathroom? HVAC closet?)
- Locate plumbing stacks (usually near bathrooms and kitchens, often in corners or interior walls)
- Check for gas lines near furnaces, stoves, and fireplaces
-
Cut inspection windows first
Instead of smashing, pros cut small “peek holes” or 6"x6" access panels to confirm what’s inside before opening a larger area.
This step alone prevents the classic DIY horror stories: cutting through copper or PEX, nicking electrical cables, or puncturing HVAC lines—repairs that can easily cost more than hiring demo out in the first place.
Secret #3: Strategic Cuts Beat Sledgehammer Swings
On TV, pros swing sledgehammers; in real life, they reach for a utility knife first.
Why controlled cuts matter
- Cleaner edges mean easier reinstall
- Less damage to adjacent surfaces
- Lower dust and fewer broken studs
- Less chance of hidden utilities getting snagged or severed
Pros will typically:
- Score along trim, ceilings, and corners with a utility knife to separate paint and caulk joints.
- Remove trim carefully with a flat bar if it will be reused.
- Use a drywall saw or oscillating tool to cut straight lines between studs.
- Take the drywall off in large, manageable sections, not random pieces.
Instead of “swinging through,” they’re always thinking about where the force ends up. A misjudged hit can crack tile on the other side of a shared wall or pop nails in adjacent rooms.
Secret #4: They Rarely Remove More Drywall Than Necessary
A big money-saving secret: pros often remove only strips of drywall instead of whole walls, especially for wiring or plumbing upgrades.
Targeted drywall removal
Contractors commonly:
- Open a 12"–24" strip at mid-height to add or reroute electrical
- Cut only up to 36" off the floor for baseboard heating or lower routing
- Open just below the ceiling to access top plates and run wiring
This keeps most of the wall intact, massively reducing:
- New drywall costs
- Taping and mudding time
- Painting and blending work
As a DIYer, you can use the same strategy: plan the minimum access you truly need. Full-wall removal is only necessary if you’re changing layouts, reframing, or dealing with major water/mold issues.
Secret #5: Nail and Screw Removal Is Where Pros Save the Wall
The difference between a repairable wall and one that needs complete replacement often comes down to how you deal with fasteners.
How pros handle screws and nails
- Back out screws when possible: They run a drywall screw gun or drill over exposed screw heads to remove them instead of yanking the panel until something gives.
- Pop the panel off the fasteners: When screws are buried, they gently pry near a stud to “pop” the panel off without destroying the stud edge.
- Deal with nails deliberately: For older walls, they use a flat bar right at the nail location, not in between, to reduce splitting the drywall into useless crumbs.
This approach preserves framing, keeps edges straighter, and makes your eventual re-drywalling job much simpler.
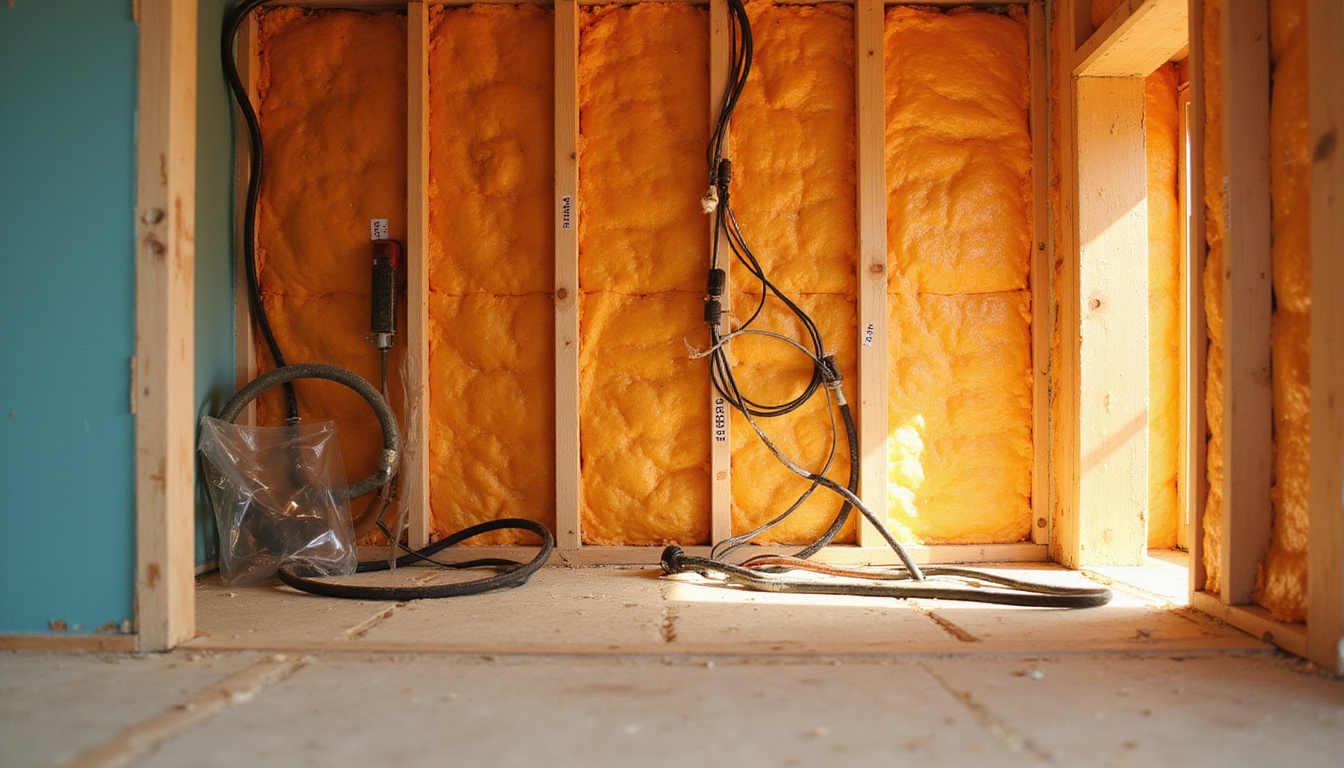
Secret #6: Dust Control Is a Skill, Not an Afterthought
Drywall dust is incredibly fine and invasive. Pros take dust control seriously because they’ve seen what happens when you don’t: contaminated HVAC systems, ruined finishes, and unhappy clients.
Pro dust-control tactics
- Score before breaking to reduce crumbling
- Cut with a knife or saw instead of pure impact
- Use a shop vac attachment on cutting tools when possible
- Keep windows open and run a box fan exhausting outward
- Tape and cover cold-air returns and supply vents in the work area
According to the U.S. CDC, repeated exposure to construction dust can pose respiratory risks, especially when silica is present (source: CDC/NIOSH). Even for a small drywall removal project, a good-quality dust mask or, ideally, a respirator is worth the small investment.
Secret #7: They Know When Drywall Removal Becomes a Hazard
There are situations where pros will slow down, call in specialists, or completely change their plan. DIYers often don’t realize these red flags until it’s too late.
Hazard red flags
- Homes built before 1980: Possible asbestos in joint compound or textured ceilings.
- Paint from before 1978: Potential lead paint, especially on trim or old finishes.
- Heavy staining and odor: May indicate extensive mold within wall cavities.
- Spongy or crumbling drywall: Could be structural rot, insect damage, or serious leaks.
If any of these are present, it’s often wiser (and legally required in some areas) to get testing or professional remediation before continuing your drywall removal.
Secret #8: Pros Sequence the Work to Avoid Rework
The order in which you remove drywall matters. Pros think through sequencing to avoid doubling their workload.
Typical pro sequence
- Remove fixtures: Outlet/switch covers, light fixtures, vents, towel bars, wall cabinets.
- Take off trim: Baseboards, door and window casing, crown moulding (if needed).
- Start from the top or bottom: Work consistently in rows or bands rather than random spots.
- Open inspection areas first: Verify where utilities run so the rest can go faster.
- Pile debris strategically: Stack drywall pieces near the exit, in flat piles for easier hauling.
This prevents trapping wires in debris, redoing cuts, and damaging trim you intended to save.
Secret #9: Disposal Strategy Is Part of the Plan
You can remove drywall perfectly and still hate the project if you didn’t plan what to do with the waste.
How pros handle debris
- Cut sheets to manageable sizes (2′ x 4′ sections) so they stack flat and carry easily.
- Line a large trash can or wheelbarrow with heavy contractor bags for small scraps.
- Use a designated “debris path” from work area to exit, protected with cardboard or runners.
- Arrange for a dumpster, trailer, or curbside bulk pickup before they start.
Trying to stuff large, broken drywall chunks into regular trash bags is a classic DIY mistake—bags rip, dust explodes everywhere, and you end up moving the same waste multiple times.
Secret #10: The Right Tools Make Drywall Removal Faster and Safer
Pros don’t show up with just a hammer. A few inexpensive tools can dramatically improve your drywall removal experience.
Essential tools checklist
- Utility knife with extra blades
- 6" and 12" flat pry bars
- Small sledge or framing hammer (used sparingly)
- Drywall jab saw or oscillating multi-tool
- Reciprocating saw with short demolition blades (for cutting nailed-on pieces, not blind cuts)
- Stud finder
- Shop vac with HEPA filter
- Safety gear: respirator or dust mask, goggles, gloves, hearing protection
You don’t need every tool a contractor owns, but these basics shift your approach from brute force to controlled removal.
Step-by-Step: A Pro-Inspired Drywall Removal Process
Here’s a simplified sequence you can follow to mimic how pros tackle most projects:
-
Plan and inspect
- Map where utilities likely run.
- Decide exactly how much drywall needs to come out.
- Identify any hazard red flags (age of house, unusual materials).
-
Protect and contain
- Cover floors, vents, and nearby furniture.
- Erect plastic sheeting if working near finished areas.
-
Remove fixtures and trim
- Shut off power, then remove covers, fixtures, and hardware.
- Carefully pry off trim you intend to reuse.
-
Score and cut
- Score along ceilings, corners, and trim lines.
- Cut inspection windows to confirm what’s behind.
- Lay out straight cut lines for your intended demo area.
-
Remove panels strategically
- Start at one corner or edge and work across.
- Pry near studs, pop panels off fasteners, and back out screws when possible.
-
Manage debris as you go
- Stack pieces neatly, don’t create a hazardous pile.
- Bag small scraps and vacuum dust periodically.
-
Inspect framing and cavities
- Check for hidden damage, mold, or pests once drywall is off.
- Take photos if you’ll be running new utilities or hiring trades.
-
Final cleanup
- Vacuum walls, floors, and surrounding areas.
- Remove plastic and floor protection last, then vacuum again.
Following a method like this keeps your project organized, safer, and much closer to how professionals approach drywall removal.
FAQ: Common Questions About Drywall Removal
Q1: How much does professional drywall removal cost compared to DIY?
Costs vary by region, but pro drywall removal often runs $1–$3 per square foot for straightforward projects, more if there are hazards or complex conditions. DIY saves on labor, but you’ll still need to factor in tool rental/purchase, debris disposal, and your time.
Q2: Can I do a partial drywall demo, or do I need to remove the whole wall?
You can absolutely do partial drywall removal. In fact, that’s what pros prefer whenever possible: targeted openings to access utilities or damaged areas, instead of full-wall demo. Just plan your cut lines thoughtfully for easier repairs later.
Q3: Is it safe to remove drywall from an old house myself?
It can be safe, but older homes raise extra concerns: asbestos in joint compound or textures, and lead paint on older finishes. Before starting drywall removal in pre-1980 homes, get suspicious materials tested and follow your local regulations for remediation and disposal.
Bring Pro-Level Drywall Removal to Your DIY Project
You don’t need a contractor’s license to work like a pro—you just need their habits: careful planning, strategic cuts, respect for what’s inside the walls, and serious dust control. When you approach drywall removal as a precision task instead of a destruction spree, you protect your home, your budget, and your sanity.
If you’re gearing up for a remodel and want to remove drywall the smart way, start by planning your scope, gathering the right tools, and walking through your project with the secrets above in mind. And if you’re still unsure about utilities, hazards, or how much to demo, consider bringing in a pro for a short consultation; that one visit can save you from the most expensive mistakes.
Ready to tackle your walls with confidence? Use this guide as your game plan, take it step by step, and turn what could be a stressful mess into a clean, controlled, pro-level drywall removal project.
Junk Guys Inland Empire
Phone: 909-253-0968
Website: www.mediumspringgreen-snake-472026.hostingersite.com
Email: junkguysie@gmail.com
