Rubble removal is often the last thing people plan for, yet it’s one of the first tasks you must tackle after construction, renovation, or a disaster. Whether you’ve demolished a wall at home, completed a major building project, or are cleaning up after a storm, getting rid of debris quickly and safely is critical. Done right, you protect people, speed up your project, and stay on the right side of the law. Done wrong, you risk injuries, fines, and costly delays.
This guide walks you through expert strategies for efficient, safe rubble removal—covering planning, tools, safety, disposal options, and when to call in the pros.
Why Proper Rubble Removal Matters
Many people see rubble as “just trash,” but construction and demolition debris come with unique risks and responsibilities.
Key reasons to take rubble removal seriously:
- Safety: Loose bricks, sharp metal, broken glass, and unstable piles can cause serious injuries.
- Efficiency: A tidy site keeps your project moving. Cluttered spaces slow workers and increase mistakes.
- Legal compliance: Municipalities often regulate how rubble is sorted, stored, transported, and disposed.
- Environmental impact: Improper dumping damages ecosystems and can lead to contamination and heavy fines.
- Cost control: Planning disposal from the start avoids last‑minute, high-priced emergency services.
Treat rubble removal as a planned phase of your project—not an afterthought.
Step 1: Assess Your Rubble Before You Move a Thing
Before lifting the first piece, evaluate what you’re actually dealing with. A quick assessment can prevent injuries and legal issues later.
Ask yourself:
- What materials are present?
Common types:- Concrete, bricks, masonry
- Wood (treated/untreated)
- Metal (rebar, piping, roofing)
- Glass, tiles, ceramics
- Drywall/plaster
- Roofing materials (shingles, tar)
- Soil and vegetation
- Are there hazardous materials?
Examples include asbestos, lead-based paint, chemicals, mold-infested materials, and certain roofing products. - How much rubble is there?
Roughly estimate by volume (cubic meters/yards) or by the number of pickup loads or skip bins you’ll need. - Where is the rubble located?
Tight spaces, upper floors, basements, or steep sites call for specialized tools or professional help.
Document anything questionable, especially materials that could be hazardous or regulated.
Step 2: Plan Your Rubble Removal Strategy
A basic plan saves time and reduces risk. Consider these core elements:
1. Choose a Temporary Storage Area
Set up a designated staging area for rubble:
- Close to the work site but out of main walkways
- On stable, level ground
- Away from drains, wells, or waterways
- With enough room for sorting and safe movement
If your project is large, you may need multiple staging areas feeding into a central location or skip.
2. Decide on Transport and Disposal
Based on volume and type of rubble, choose from:
- Skip/bin rental for medium to large projects
- Truck or trailer if you plan to haul debris yourself
- Professional rubble removal services for heavy, hazardous, or large-scale jobs
- Municipal drop-off sites (transfer stations, recycling centers)
Check local regulations on:
- Weight limits
- Load covering requirements
- Accepted materials and fees at disposal sites
3. Schedule Removal to Match the Project
Don’t wait until the end. Plan rubble removal in phases:
- After demolition or strip-out
- At key milestones of construction
- Before finishing work (painting, flooring, etc.)
Regular clear-outs keep your workspace safe and efficient.
Step 3: Gear Up with the Right Tools and Safety Equipment
Attempting rubble removal with the wrong equipment is a common and dangerous mistake.
Essential Safety Gear (PPE)
- Heavy-duty work gloves
- Safety goggles or face shield
- Dust mask or respirator (especially with concrete dust or mold)
- Steel-toe boots or reinforced work shoes
- Long pants and long-sleeve shirts
- Hard hat (for overhead hazards)
- Hearing protection (for power tools, jackhammers)
Useful Tools and Equipment
- Shovels (flat and round)
- Wheelbarrows or rubble carts
- Heavy-duty contractor bags
- Pry bars and crowbars
- Sledgehammers
- Buckets for small loads or tight areas
- Utility knife and tin snips
- Tarp or plastic sheeting to protect surfaces and contain dust
For larger projects:
- Skid steer loader or mini-excavator
- Jackhammer or demolition hammer
- Conveyor systems (for basements or confined spaces)
Never overlook PPE. Most rubble removal injuries are preventable with basic protective gear.
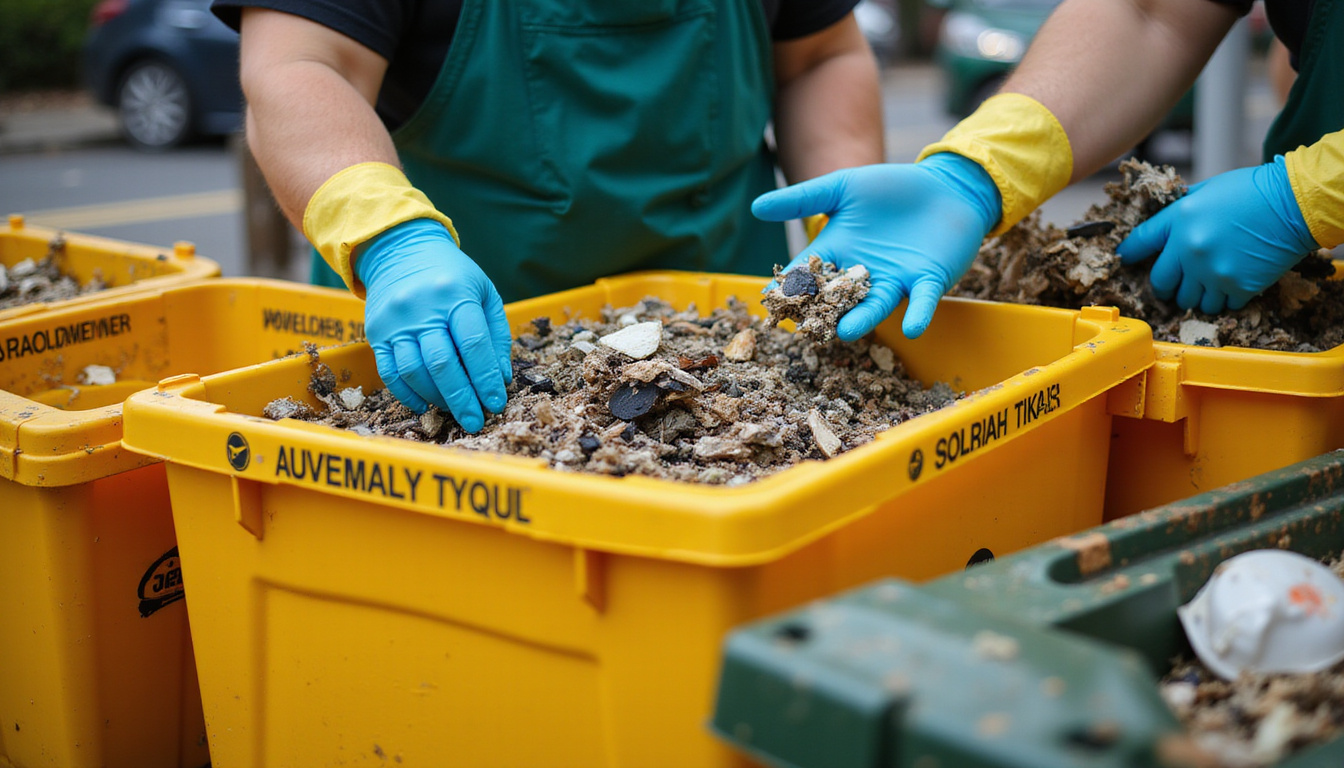
Step 4: Sort Rubble for Faster Disposal and Better Recycling
Sorting as you go may feel like extra work, but it pays back in lower disposal costs and environmental benefits.
Common Sorting Categories
- Concrete, brick, and masonry – Often recyclable as aggregate.
- Metals (steel, copper, aluminum) – Highly recyclable and sometimes profitable.
- Wood – Untreated wood may be recyclable; treated wood often has separate disposal rules.
- Clean drywall – In some areas, it can be recycled; wet or moldy drywall usually goes to landfill.
- Mixed waste – Anything that can’t be easily separated.
Hazardous or Special-Handling Materials
- Asbestos-containing material
- Lead-painted surfaces
- Solvents, adhesives, oils
- Batteries and electronics
- Fluorescent lamps and certain insulation
These require special handling and must never be mixed with general rubble. Refer to your local environmental authority or health department guidelines (for example, the U.S. EPA provides detailed construction and demolition debris information (source):
https://www.epa.gov/smm/sustainable-management-construction-and-demolition-materials
Step 5: Safe Handling Techniques to Avoid Injury
Even small rubble removal jobs can cause strains, cuts, and accidents if you move too quickly or lift incorrectly.
Lifting and Carrying Basics
- Bend your knees, not your back. Keep loads close to your body.
- Know your limits. Team-lift heavy items like concrete slabs or large beams.
- Use mechanical help. Wheelbarrows, dollies, and carts are safer than carrying debris by hand.
- Watch your footing. Clear a path first, then move rubble.
Site Safety Practices
- Keep walkways clear and dry.
- Expose and cap any protruding nails or sharp edges.
- Stack materials low and stable—no leaning piles.
- Use spotters when moving heavy loads in tight spaces.
- Restrict access to the work area, especially for children and pets.
If at any point rubble feels unstable (e.g., half-demolished walls or overhead sections), stop and reassess before proceeding.
Step 6: Choose the Right Disposal Option
The best method for rubble removal depends on your volume, budget, and local facilities.
Skip or Dumpster Rental
Ideal for:
- Larger home renovations
- Small commercial projects
- Multi-day or multi-week work
Benefits:
- Convenient on-site storage
- Fixed capacity helps you plan
- Often includes disposal and recycling in the fee
Tips:
- Check weight limits—concrete and brick get heavy quickly.
- Get required permits if placing a skip on public roads.
Professional Rubble Removal Services
Best when:
- You have heavy, bulky, or awkward debris
- Access is difficult (upper stories, narrow alleys)
- You need fast, one-day cleanup
- There may be hazardous materials involved
Pros:
- They bring equipment and labor
- They understand regulations and recycling options
- You minimize risk to yourself and your team
DIY Hauling to a Facility
Works for:
- Smaller loads
- People with a suitable truck/trailer
- Areas with accessible municipal drop-off sites
Checklist before you go:
- Confirm materials accepted and any fees
- Cover and secure your load (often legally required)
- Bring tools to help unload (shovel, rake, gloves)
Step 7: Minimize Dust, Noise, and Neighbor Impact
Rubble removal often disturbs more than just your immediate site. Being considerate keeps neighbors and local authorities on your side.
Control Dust
- Lightly mist rubble with water before moving it (avoid soaking to prevent slippery surfaces).
- Use dust barriers (plastic sheeting, zip walls) indoors.
- Seal and double-bag particularly dusty materials.
Limit Noise and Traffic
- Follow local quiet hours and construction noise rules.
- Group noisy tasks into shorter, predictable periods.
- Plan delivery and pickup of skips during daytime hours.
Keep It Tidy
- Avoid overflowing skips or piles spilling into sidewalks or streets.
- Clean up loose debris daily.
- Remove nails, screws, and sharp fragments from driveways and public areas.
Step 8: Final Site Cleanup and Inspection
Once the bulk of your rubble removal is done, a careful final sweep ensures the space is truly safe and ready for the next phase.
Final steps:
- Walk the area slowly, scanning for nails, glass, or metal shards.
- Use a magnet (or magnetic sweeper) for any site where nails or screws were used.
- Sweep or vacuum dust, paying attention to corners and edges.
- Check for remaining trip hazards, uneven surfaces, or protruding objects.
- Confirm all rubble has been disposed of legally, with receipts or documentation as needed for permits or inspections.
A clean, clear site not only looks better but also builds trust with clients, neighbors, and inspectors.
When You Should Not DIY Rubble Removal
There are situations where expert help isn’t just convenient—it’s essential.
Consider hiring professionals immediately if:
- You suspect asbestos, lead paint, or chemical contamination.
- Structural elements (load-bearing walls, beams) are unstable.
- There’s post-disaster debris (flood, fire, major storm) involving mixed hazards.
- You lack appropriate equipment for very heavy loads.
- Local law requires licensed contractors for certain waste types.
Professional rubble removal teams are trained in hazard recognition, safe handling, and compliant disposal, reducing risks that amateurs might miss.
Quick Checklist: Efficient, Safe Rubble Removal
Use this list to keep your project on track:
- Assess materials, volume, and access points.
- Identify any hazardous or regulated materials.
- Plan staging areas and disposal logistics.
- Equip yourself with proper PPE and tools.
- Sort rubble as you go (concrete, metal, wood, mixed, hazardous).
- Use safe lifting and handling techniques.
- Choose suitable disposal: skip, pro service, or DIY hauling.
- Control dust and noise; respect neighbors and regulations.
- Perform a thorough final cleanup and inspection.
- Keep records of disposal for permits or future reference.
FAQ: Common Questions About Rubble Removal
Q1: How much does rubble removal cost?
Costs vary based on volume, type of debris, access difficulty, and local fees. A small DIY load to a municipal facility might cost only gate fees, while skip hire or professional rubble removal services are priced by bin size, weight, and labor. Get itemized quotes and ask about recycling credits where available.
Q2: Can I mix different types of debris for construction rubble removal?
Some facilities accept mixed construction debris, but you’ll often pay more than if you sort materials. Concrete, metal, and clean wood are commonly cheaper to dispose of or can be recycled if kept separate. Check your local waste guidelines before mixing rubble.
Q3: Is household renovation rubble considered hazardous waste removal?
Not usually—but specific items within renovation rubble can be hazardous (e.g., asbestos tiles, lead-painted wood, old insulation, certain adhesives). If your building is older or you’re unsure about materials, have a professional assess before doing your own rubble removal and disposal.
Clear Your Site with Confidence: Take the Next Step
Every successful project ends with a clean, safe space—and that starts with smart rubble removal. By assessing materials, planning disposal, using proper safety gear, and choosing the right mix of DIY and professional help, you can clear debris quickly without cutting corners on safety or compliance.
If you’re facing a sizeable or complex cleanup, don’t wait until rubble slows your progress or puts people at risk. Reach out to a reputable local rubble removal service, get a clear quote, and schedule your cleanup now so your project can move forward on time, on budget, and on solid ground.
Junk Guys Inland Empire
Phone: 909-253-0968
Website: www.mediumspringgreen-snake-472026.hostingersite.com
Email: junkguysie@gmail.com